
Looking to set up a stunning saltwater aquarium in your home without breaking the bank?
Well, you’re in luck, my friend! This definitive guide will show you the ropes and have you well on your way to creating your own personal aquatic oasis.
But, let’s be real, we know that setting up a saltwater aquarium can be a bit overwhelming. You’ve got questions, concerns, and a long list of tasks to tackle. Don’t fret! This guide is here to help you every step of the way. And if you have a specific question after this blog that you would like answered, give us a call! We’ve got your back!
Before we dive into the nitty-gritty of setting up your tank, take a moment to reflect on what you want for your saltwater aquarium and where you’re starting from. Sure, you’ve probably already dreamt up your perfect tank, scoured books, blogs, and message boards for inspiration, but it’s essential to put pen to paper and figure out what you really want. By answering a few simple questions, you can start shaping the path to creating the aquarium of your dreams. Let’s get started!
Now, let’s get to the fun part! Close your eyes and picture your dream saltwater aquarium. What do you see? Is it a sleek, modern design, or a more traditional look? Is it a massive tank that spans an entire wall, or a smaller, more manageable size? And what kind of marine life do you want to have inside? The possibilities and combinations are endless!

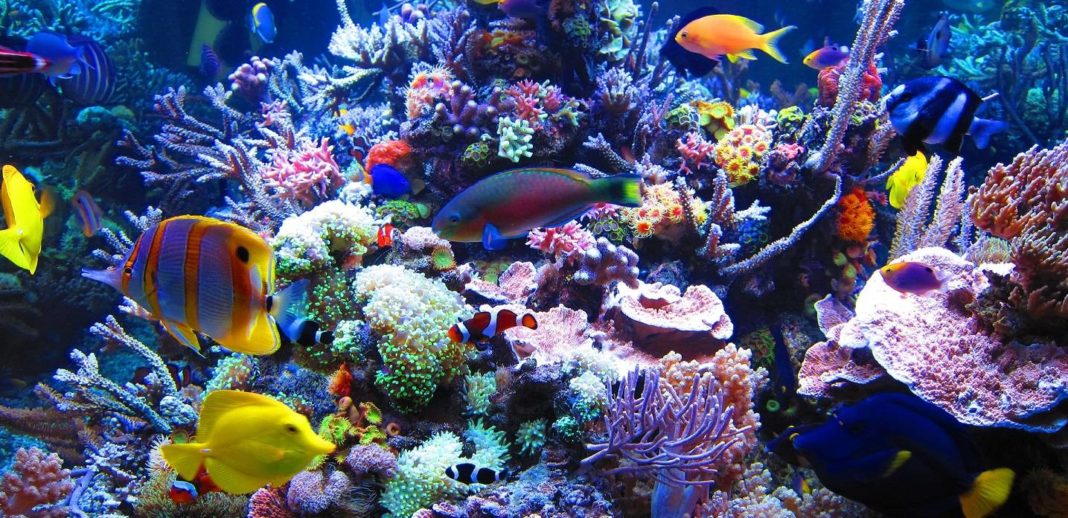
Maybe you’re dreaming of a reef tank, complete with a colorful array of fish, corals, shrimp, crabs, snails, and clams. You can design intricate rockwork, called an aquascape, to create a beautiful and natural-looking environment for your marine life to thrive.
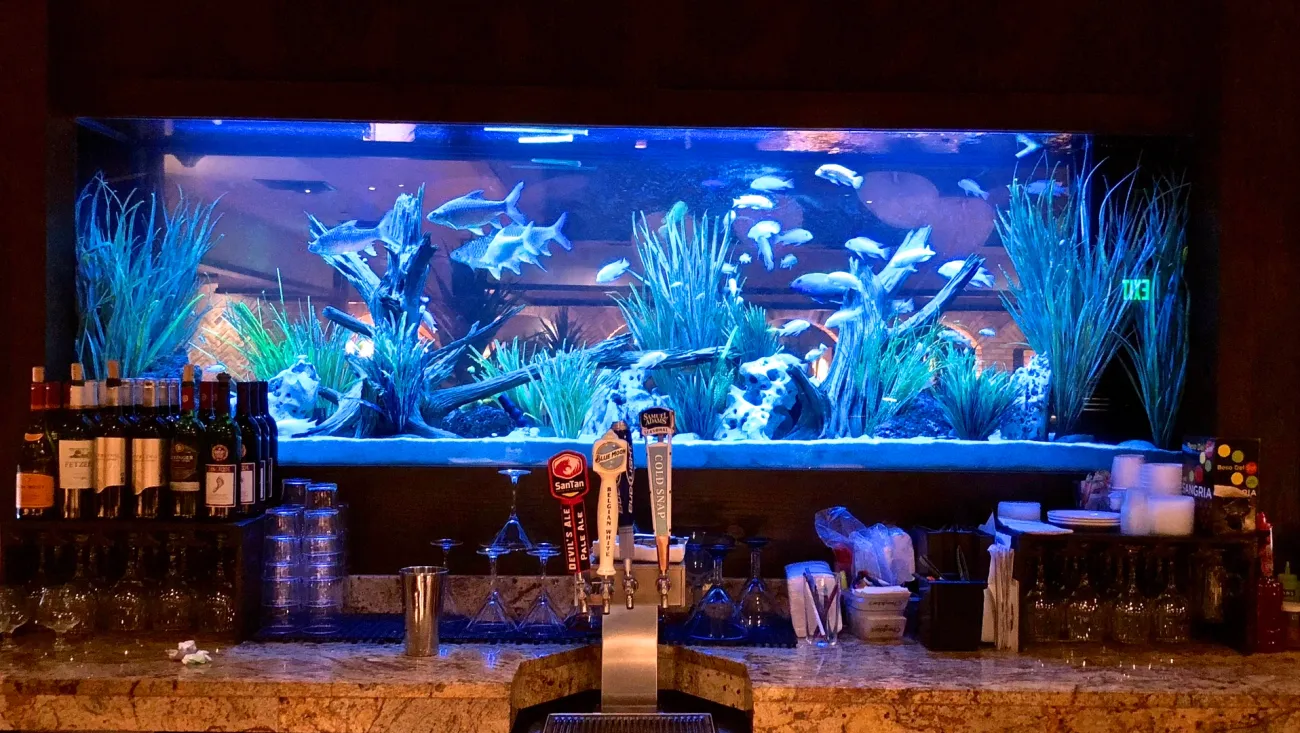
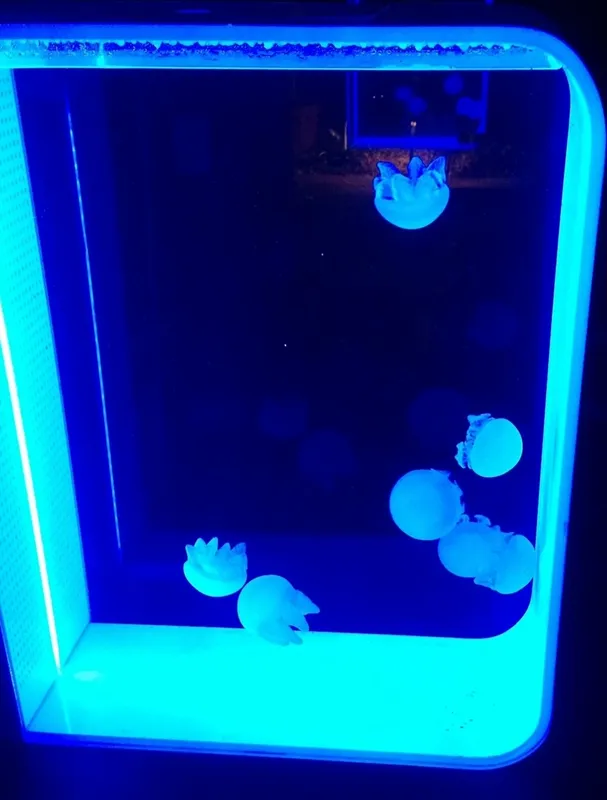
Or perhaps you’re more drawn to a more open design, with larger fish swimming around. You might even have your sights set on a predator tank, where you can showcase the unique hunting techniques of your marine predators whenever your friends come over. Who wouldn’t want to show off their own personal shark and stingray? Have you ever dreamed of a species only tank? Maybe cuttlefish? Octopus? Mantis shrimp? JellyFish? Clownfish harem or even a clownfish circus?
If you’re not quite sure what kind of tank you want yet, that’s okay too! Many people start out unsure of what they want, and that’s why it’s essential to think through a rough plan before rushing out to buy supplies and set up the tank. Knowing the type of tank you want will impact the setup and ensure you have the right equipment for the job. If you’re ever unsure or have questions about your project, feel free to give us a call and speak to one of our knowledgeable staff members. We’re here to help you every step of the way
Let’s talk about style! When you’re dreaming up your perfect saltwater aquarium, what kind of vibe are you going for? It’s not just about the size and shape of the tank – it’s also about the look and feel of the tank itself. Are you into a sandy bottom, or do you prefer to see the glass? And if you do want sand, what kind? Fine sand, chunky coral skeleton sand, or maybe even black sand for a dramatic touch?
The type of sand you choose can also affect the health and well-being of the marine life in your tank. A deep sand bed, for example, can create a mini-ecosystem and improve water quality, but some people find it less visually appealing. A shallow sand bed, on the other hand, doesn’t have as many benefits but can create a more aesthetically pleasing look. And if you’re thinking about keeping demanding corals, a bare bottom tank might be your best bet – it’s easy to clean and won’t get stirred up by the strong water movement required for these types of corals.
But it’s not just about the sand – there are so many other style choices to consider! Do you want corals all over the tank, creating a colorful wall of beauty? Or are you more into branching corals or those with a more rounded shape? And what about sea anemones or other types of mollusks? And don’t forget about the live rock – do you want it to cover the back of the tank or just be scattered throughout?
Looking at other saltwater aquarium setups and talking to other hobbyists can give you great ideas and inspiration. Don’t be afraid to ask questions and get input from others – you might just discover a style that speaks to you and helps you create the perfect tank.
It’s important to start with a tank and aquarium set up that is appropriate for your skill level. In general, it’s best to start with a simpler setup and work your way up as you gain experience and knowledge. This will help prevent frustration and disappointment, as well as potential harm to the fish and other creatures in your aquarium.
If you’re a beginner, it’s best to start with a smaller tank (20-40 gallons range) and focus on hardier, more forgiving species. As you gain experience, you can move on to more complex aquarium setups, larger tanks, and more delicate species.
It’s also important to be honest with yourself about how much time and effort you’re willing and able to put into your aquarium. Some setups require more maintenance, testing, and equipment than others, so be realistic about what you can handle. If you’re not sure, it’s always a good idea to start small and work your way up.
Let’s take a closer look at what goes into the aquarium setup for each of these levels:
- Beginner: For a beginner saltwater aquarium setup, it’s recommended to start with a tank size of at least 30 gallons. This allows for a stable water environment and more room to work with. Choose hardy and adaptable fish such as clownfish, damselfish, and gobies. Invertebrates like snails, hermit crabs, and shrimp are also good choices. Keep in mind that it’s important to have a good filtration system and to regularly test and maintain water parameters.
- Intermediate: An intermediate saltwater aquarium setup requires a bit more knowledge and equipment. Tank size can range from 0.5-1 million gallons. It’s important to have a protein skimmer to remove organic waste from the water and a sump for additional filtration. At this level, you can introduce more delicate fish species like tangs, angelfish, and wrasses, as well as soft and hard corals. Lighting and water flow become more important to keep corals healthy.
- Advanced: An advanced saltwater aquarium setup requires a lot of attention to detail and advanced equipment. In addition to a protein skimmer and sump, an advanced setup may require a calcium reactor or dosing system to maintain water chemistry. At this level, you can introduce more challenging species like certain types of anemones, clams, and SPS corals. Lighting and water flow become even more critical to provide the right environment for these creatures.
It’s important to note that these levels are not set in stone, and there is a lot of overlap between them. The key is to educate yourself and take the time to plan out your aquarium setup to ensure success.
When setting up your beginner saltwater aquarium, make sure to research the appropriate tank size for the fish you want to keep. You will also need a filtration system, such as a hang-on-back (HOB) filter or a canister filter, as well as a protein skimmer to remove organic waste from the water. A heater is also necessary to maintain a stable water temperature in colder regions.
Live rock is a great addition to a beginner saltwater aquarium as it helps with biological filtration and provides a natural environment for the fish to explore. Average is about a lb per gallon.
Overall, with a little research and patience, a beginner can successfully set up and maintain a saltwater aquarium. As you gain experience and knowledge, you can gradually move on to more complex tank setups and more demanding fish and coral species.
Live rock provides natural filtration, and live sand helps establish beneficial bacteria that contribute to a healthy environment. You can also start experimenting with different lighting options to support the growth of your corals.
It’s important to keep an eye on water parameters, including temperature, salinity, pH, and nitrate levels. Regular water changes and proper maintenance of equipment are also crucial to ensure the health of your aquarium inhabitants. As you progress through the moderate level, you can start experimenting with more challenging corals and fish.
At the advanced level, it’s not just about the corals anymore. Advanced saltwater aquarium set ups require a high level of attention to detail in all aspects of the tank. You’ll need to have a deep understanding of water chemistry, and you’ll need to perform frequent and detailed water testing. Dosing and nutrient control become even more important at this level. You may need to use advanced equipment like protein skimmers, calcium reactors, and dosing pumps to maintain ideal water parameters.
In addition to advanced coral species, you may also consider keeping more delicate and demanding fish species, like certain types of anthias and achilles tangs for instance. But be aware that these fish often come with a higher price tag and require more specialized care.
Overall, an advanced saltwater aquarium set up requires a high level of commitment, time, and resources. It’s not for everyone, but for those who are up for the challenge, it can be an incredibly rewarding experience.
On the other hand, building your own saltwater aquarium setup means you have more control over the design, equipment, and the overall performance of your tank. You can choose the size of the tank, equipment, lighting, and other accessories to suit your specific needs. However, building your own tank requires more research, planning, and time to ensure you get everything right. It can also be more expensive than buying an all-in-one kit.
Overall, the decision to go with an all-in-one aquarium or build your own depends on your experience level, budget, and personal preferences. It’s important to do your research and consider all the pros and cons before making a decision.
Building your own aquarium also allows for greater customization in terms of tank size, filtration, lighting, and other equipment. You can tailor your setup to the specific needs of your chosen fish and coral species, and make adjustments as needed over time. This can be especially important if you have more demanding or delicate species that require specific water conditions or other environmental factors.
However, building your own aquarium can be more expensive in the long run, especially if you’re investing in high-quality equipment and materials. It can also be more time-consuming and require more research and planning upfront to ensure that everything is set up correctly and running smoothly. If you’re not confident in your ability to build your own setup, it may be better to start with an all-in-one kit or seek the advice of a professional.
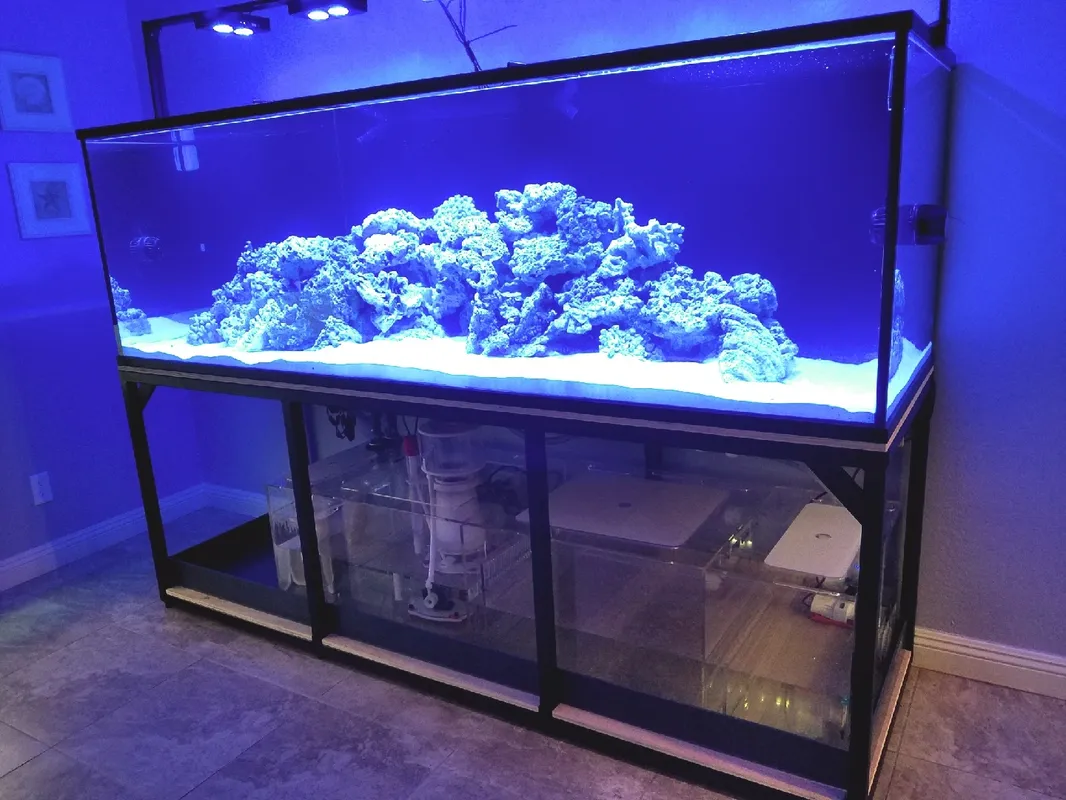
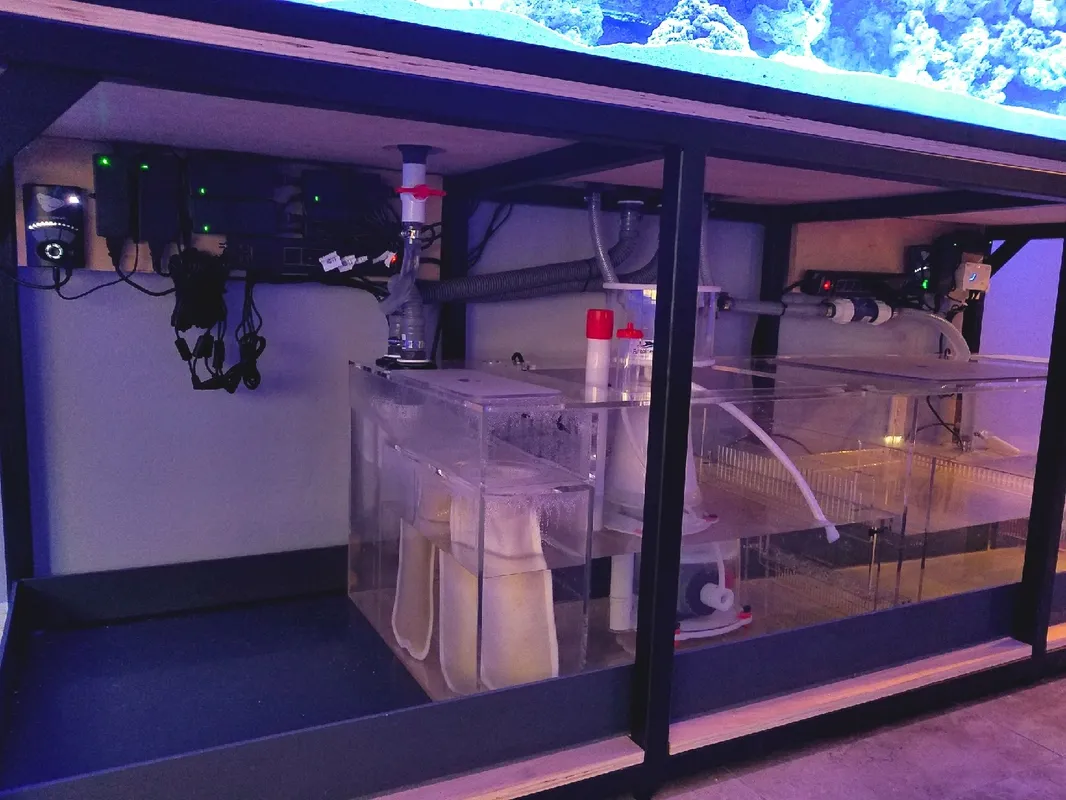
An aquarium sump setup can greatly improve the functionality of your saltwater aquarium system. A sump tank is essentially an additional tank that sits underneath your main display aquarium and provides extra volume and filtration for your system. It is connected to your main tank through an overflow and return system that allows water to flow between the two tanks.
The main benefit of a sump tank is that it increases the total volume of your aquarium system. This extra water volume helps to stabilize the water temperature and chemistry, making it easier to maintain a healthy and stable environment for your fish and other aquatic creatures.
In addition, a sump tank can provide a space for additional filtration equipment, such as a protein skimmer, heater, and refugium. The protein skimmer removes organic waste and other particles from the water, while the heater helps to regulate the water temperature. The refugium is a section of the sump tank that is used to cultivate beneficial microorganisms that can help to break down waste and excess nutrients in the water.
One of the great things about sump tanks is that they are highly customizable. You can set up your sump tank in a variety of different ways to best suit your needs and the needs of your aquarium inhabitants. For example, you can add additional filtration equipment, such as a UV sterilizer or phosphate reactor, to further enhance the water quality.
Overall, if you are serious about maintaining a healthy and thriving saltwater aquarium, a sump tank is definitely worth considering. It can greatly improve the stability and functionality of your aquarium system and provide a space for additional filtration equipment to keep your water quality in check. Just be sure to do your research and consult with a professional if you are unsure about how to set up and maintain your sump.
Let’s dive deeper into each of these criteria
- Can the floor support the weight?
- Saltwater aquarium setups can be incredibly heavy, especially when filled with water, sand, and live rock. Make sure to select a location with a solid foundation, such as a concrete floor or a wooden floor joist. Avoid setting up your aquarium on a second-story floor unless you’ve confirmed that the structure can support the weight. If you’re unsure about the floor’s capacity, consult a professional engineer or an aquarium installation expert.

- Will nearby “stuff” end up ruined if wet or salty?
- Saltwater aquariums have a way of making a mess. Over time, salt creep can cause nearby surfaces to corrode or rust, and spills can damage carpets and wood furniture. Avoid setting up your aquarium near electrical outlets or any other electronics. It’s also essential to ensure that your aquarium is not near anything that can get damaged by water, such as books, papers, or fabric.
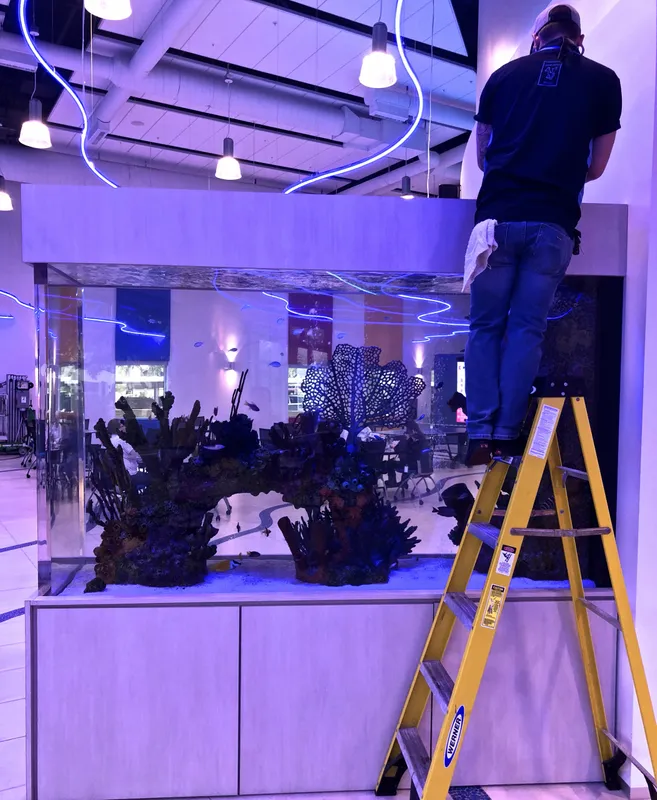
- Easily accessible
- You’ll need to have easy access to your aquarium for maintenance, feeding, and cleaning. Choose a location where you can comfortably reach all parts of the tank, including the sides and the bottom. Additionally, make sure there’s enough room for any necessary equipment, like a protein skimmer or a sump, and that you can get your hands in there to adjust, clean, and repair them.
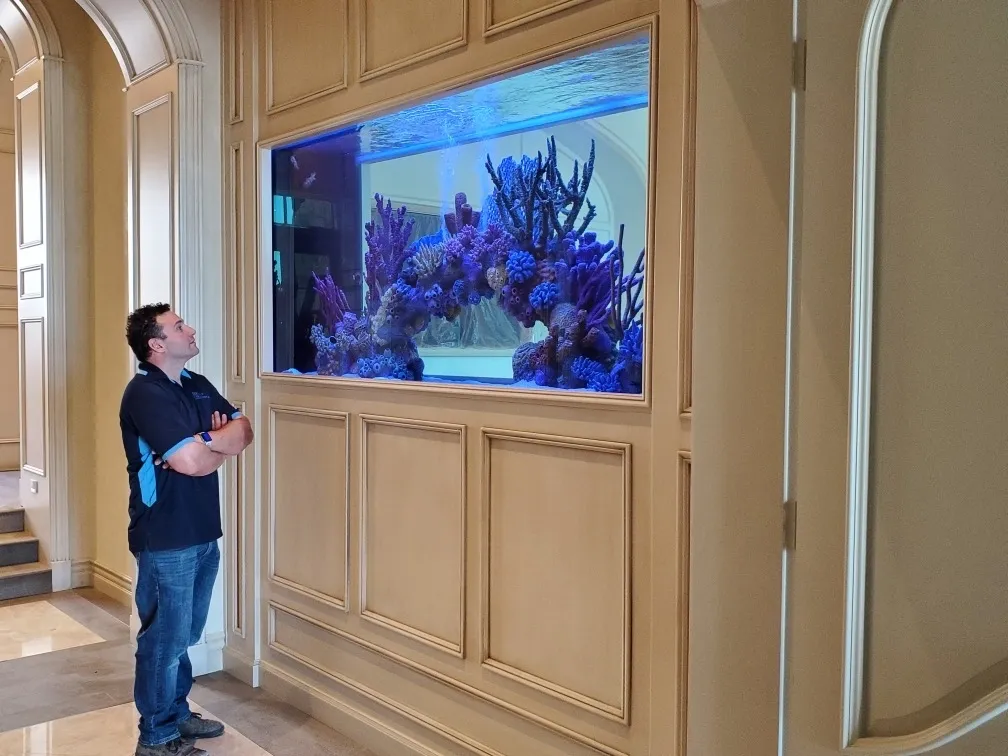
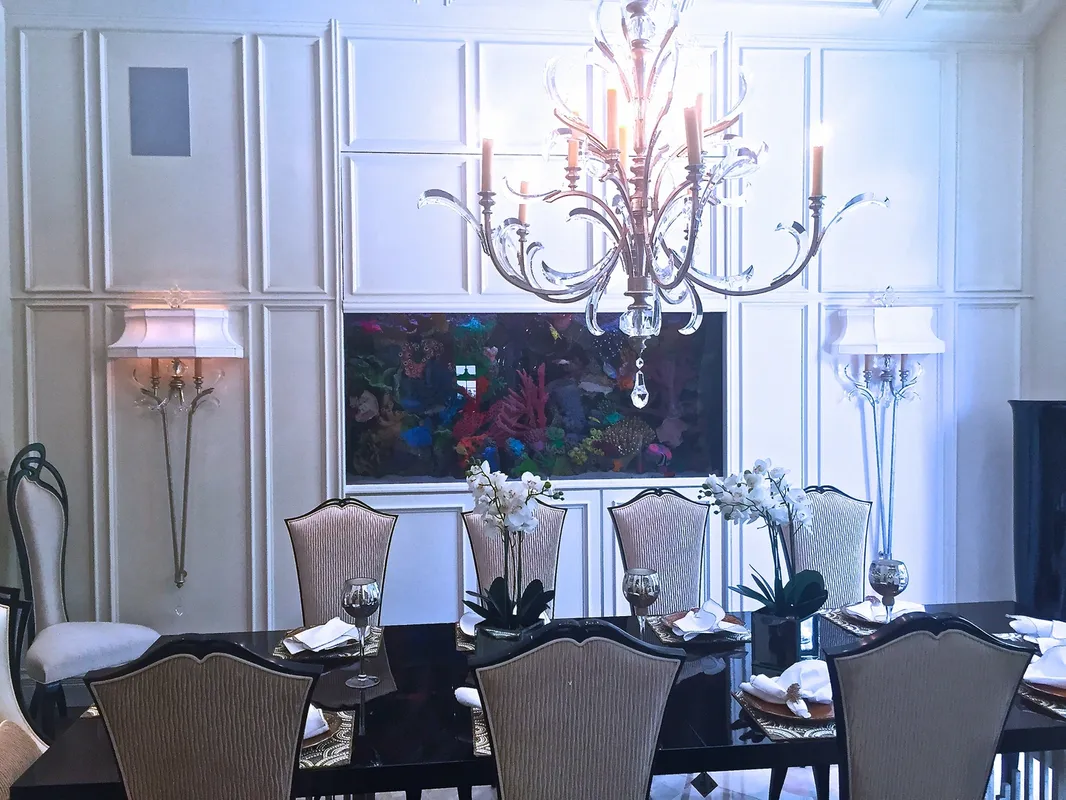
- Visible (hopefully that’s an obvious one)
- Your aquarium should be in a place where you can enjoy it! It’s one of the most beautiful, serene and interesting things you can add to your home, so make sure it’s in a spot where you can view it often. A common location for saltwater aquariums is the living room, where you can easily see it while relaxing on the couch. But you can also consider other spaces like a home office, bedroom, or even the kitchen.
- Not prone to major hot or cold temperature changes
- Saltwater aquariums are sensitive to temperature fluctuations. Setting up your aquarium in a location that experiences major temperature changes (such as near a window or door) can be problematic. Excess heat can cause your water to evaporate faster, while cold drafts can cause your aquarium temperature to drop. If possible, avoid locations with direct sunlight, air conditioning, or heating vents.
- Well-ventilated
- Good airflow around your aquarium will help to prevent moisture build-up and improve the air quality in your home. Poor ventilation can lead to a buildup of mold, mildew, and other unpleasant odors. Consider adding a small fan near the aquarium to help with air circulation. Additionally, make sure to open windows and doors regularly to allow fresh air into the space.
By considering these six criteria, you’ll be able to choose the perfect location for your saltwater aquarium setup. Remember to take your time and think through your decision carefully. Once you’ve set up your aquarium, it can be difficult to move it, so selecting the right location from the start is crucial.
It’s essential to check the weight capacity of the floor in the room where you plan to place the tank. If you’re on the ground floor, concrete slabs tend to be stronger than wooden floorboards. For upper floors, consider consulting a structural engineer to assess the floor’s weight-bearing capacity. If your floor can’t hold the weight of your tank, you may need to reinforce the floor or find a different location.
It’s also important to remember that salt water weighs around 8.6 pounds per gallon, so the amount of water you put in the tank can significantly affect its weight. For example, a 100-gallon tank filled with water weighs over 860 pounds, and that’s without considering the weight of the tank, substrate, decorations, and equipment. So when calculating the total weight, be sure to factor in all the components of your setup.
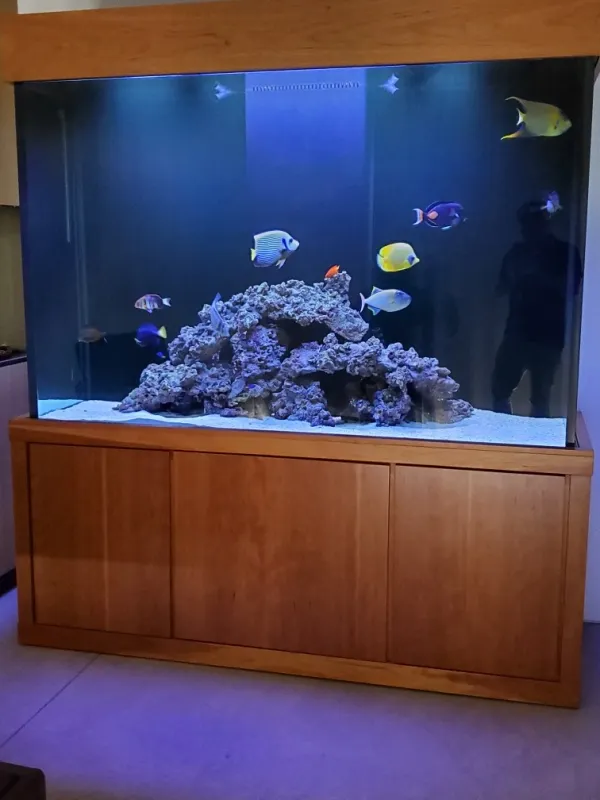
Another point to keep in mind is that tanks with stands or cabinets can distribute the weight more evenly and add more structural support to the tank’s base. However, you should still ensure that the stand or cabinet is sturdy and able to handle the weight of the tank and its contents.
Taking the time to ensure that your chosen location can support the weight of your saltwater aquarium setup can save you from costly and potentially dangerous mishaps down the line.
In addition to water and salt, it’s important to consider the potential damage that can be caused by humidity. Your saltwater aquarium set up will create a lot of humidity in the surrounding area, and that can damage nearby furniture, electronics, and other items. Be sure to keep your aquarium away from anything that can be damaged by high humidity levels.
Another consideration is the impact of salt spray on nearby electronics. Saltwater can corrode metal, and if your tank is near a TV, computer, or other electronic device, you could end up with costly damage. Keep your tank away from electronics, or consider using a cover to protect nearby items.
Overall, be sure to consider all of the potential risks and sources of damage before you choose a location for your saltwater aquarium set up. It’s important to choose a location that is both safe for your home and enjoyable for you to watch and maintain.
You’ll need a protein skimmer to help remove waste and excess nutrients from the water. This will help keep the tank clean and prevent harmful buildup. You’ll also need a good quality filtration system to keep the water clean and clear.
Don’t forget the lighting! You’ll want to choose the right type of light to promote the growth of your corals and algaes. A timer is also helpful so you can ensure your lights are on a regular schedule.
Finally, test kits are a must-have for any hobbyist. They allow you to monitor the water quality and make adjustments as needed. A good test kit should include tests for pH, ammonia, nitrite, nitrate, and salinity.
With these essential tools, you’ll be well on your way to setting up a successful saltwater aquarium!
Ah, the joys of setting up a saltwater aquarium! You’ve already made some major decisions so far, like selecting the perfect tank, equipment, and marine creatures to call it home. You’ve even found the perfect spot to display your aquatic masterpiece. Now it’s time to get your hands wet and tackle the main event: the saltwater aquarium set up!
Ensure your new saltwater aquarium won’t leak by testing it before adding expensive marine life. Find a suitable spot for your tank and fill it with freshwater. Dry the outside and mark the water level. Leave it for a day or two and periodically check for any leaks or puddles outside the tank. It’s better to be safe than sorry as aquariums are made of delicate materials. If it passes the test, add saltwater and begin your marine life adventure. Otherwise, discovering a leak during testing saves you from headaches and costly damages.
After confirming that the tank is leak-free, it’s time to move it to its designated spot. As you’ve already considered the best location, the space should be cleared and ready for the tank. If you bought a stand, make sure it’s assembled and in place. Keep all the necessary equipment close by to avoid unnecessary back and forth trips. Give yourself enough room to work but be careful not to accidentally kick or step on the tank and cause a leak.
Level the Aquarium
Ensure that your tank is level to prevent uneven pressure on the seams that can lead to leaks. Even established tanks can leak due to stress caused by uneven pressure. To check if your tank is level, use a level tool, which can be purchased at any hardware store or online. It is recommended to have all necessary equipment close by to avoid accidentally damaging the tank while moving around. We also recommend using a yoga mat to help pad to tank because tank and stand will not always be 100% form fitting. The yoga mat will allow the stress to remove “pressure points” or “hot spots” that could potentially cause a seam split or even crack.
Sand/Substrate
Add substrate to the tank’s bottom. Choose a substrate that works well for your desired look and the needs of your marine life. Choosing the substrate for your aquarium is a balance between aesthetics and practicality. The appearance of the substrate will greatly impact the overall look of your aquarium, but it also serves important functional purposes. For example, the substrate can provide a surface for beneficial bacteria to grow, which will help maintain a healthy and stable environment for your fish and other creatures.
Whether you pick coarse or fine sand or crushed coral has surfaces that bacteria will grow on. Those bacteria create the base of your biological filter and actually help make your saltwater aquarium set up an appropriate habitat for the creatures in your tank. The bacteria that live at the top of your sand bed (and every other wet surface in your aquarium) convert the toxic chemical ammonia into nitrite and then eventually nitrate. That means you’re helping out your tank, no matter WHAT type of substrate you choose.
You will also notice tiny creatures (copepods, amphipods, bristle-worms, and other fun critters) will take up residence in your substrate. Really cool stuff.
However, it’s noteworthy to point out that coarse sand and crushed coral substrates can be a little dirtier than fine sands. That’s because food and waste particles fit into the nooks and crannies. If you don’t vacuum the waste regularly, it will slowly pollute your tank and cause your nitrates to rise. It’s not the end of the world and not something to worry excessively about.
That cleanliness factor is one of the major reasons many people decide on a bare bottom tank, though. Any extra food or waste is easily identified and removed.
If you have a tall tank, you may want to consider creating a deep sand bed (sometimes abbreviated DSB in online saltwater aquarium forums like Reef2Reef). In addition to creating a great place for bacteria and copepods and other critters to grow, a deep sand bed also creates somewhere for anaerobic bacteria to grow.
Anaerobic bacteria live without oxygen. Deep in the sand bed (see where the name comes from?), these bacteria remove nitrate from the reef system, shifting the waste from the tank. DSBs are not all roses, though. (In fact, they smell more like rotten eggs if you stir them up) But they can be a fun and functional option for your substrate.
Washing your substrate is an essential step in the setup process, as it ensures that any impurities or debris are removed before they have a chance to affect the water quality in your tank. Even if you purchased high-quality sand, it is still recommended that you wash it thoroughly. This will prevent your tank water from turning cloudy due to the fine particles that inevitably end up in the sand during transportation and packaging.
When washing your sand, it is best to do it outside or in a large bucket. Fill the container with sand, add water, and agitate the sand until the water turns cloudy. You can then use a sieve or mesh screen to pour off the cloudy water, removing the finer particles along with it. Repeat this process until the water runs clear, indicating that the sand is adequately washed.
It is worth noting that live sand does not require washing. This is because live sand contains beneficial bacteria and microorganisms that are necessary for establishing a healthy biological system in your tank. When you purchase live sand, it will typically come packaged in water, and you should avoid washing it, as this will kill the beneficial organisms.
Once you have washed your sand (or if you are using live sand), you can then place it in your tank. It is recommended to add the sand in a shallow layer first and then gradually build it up as needed. This will prevent air pockets from forming, which can cause problems with water circulation and potentially lead to anaerobic conditions in your substrate.
When it comes to selecting sand for your saltwater aquarium, there are a few options available to you. Some hobbyists opt for dry sand, which is essentially the same as the sand you would find at the beach or in a playground. However, you might also want to consider adding biologically active live sand to your aquarium setup. Live sand comes in a variety of sizes and colors to match the design of your tank, and it is already colonized by millions of bacteria, making it biologically active.
One of the benefits of live sand is that it comes wet and biologically active, which means that you can either shorten the amount of time it takes for you to cycle your tank or eliminate it altogether. On the other hand, dry sand is biologically inactive and needs to be washed before you add it to your tank, but it is less expensive than live sand.
If you can’t afford to use live sand exclusively, you don’t need to worry too much about missing out on its benefits. Sand and bacteria go hand in hand, and over time, bacteria will grow on dry sand, too. As a result, dry sand will eventually become more like live sand in terms of its beneficial properties. If you still want to give your biological filter a boost with live sand, you can add a base of dry sand and then top it off with a bag or two of live sand.
If you do decide to start with live sand, it is important to ensure that the sand remains moist before moving on to the next step. Adding enough newly mixed saltwater to your aquarium will help to keep the sand moist and prevent the bacterial organisms from dying out. Ultimately, the type of sand you choose will depend on your preferences and budget, but both dry sand and live sand have their benefits and drawbacks.
Live/dry Rocks
Dry rock and live rock are both commonly used in saltwater aquariums for different reasons.
Dry rock is essentially dead rock and doesn’t have any living organisms attached to it. It’s cheaper and can be used as a base rock, while live rock can be added later. Dry rock also gives you more control over what types of organisms are added to your tank because it doesn’t have any hitchhikers (unwanted organisms like pests or parasites) that can come with live rock.
Live rock, on the other hand, is covered in living organisms and provides an excellent source of natural filtration for your aquarium. It can be expensive, but it’s worth it for the biological diversity it brings to your tank. Live rock is also a great way to start a new tank because it provides an immediate source of beneficial bacteria to kick-start the nitrogen cycle.
When adding rock-work to your aquarium, start by adding a base layer of large, sturdy rocks to create a stable foundation. Then, build upwards and outwards by adding smaller rocks, creating caves and crevices for your fish and invertebrates to explore and hide in. Make sure to leave plenty of open space for swimming and ensure that the rocks are secure to prevent any accidents or collapses.
It’s important to note that adding live rock to your aquarium can cause a temporary spike in ammonia and nitrite levels, so it’s recommended to add it slowly over a period of a few weeks to allow the bacteria to establish themselves and prevent any harm to your tank inhabitants.
Dry rock is a popular choice for many saltwater aquarium hobbyists due to its cost-effectiveness. Unlike live rock, dry rock is sold without helpful bacteria or interesting invertebrates and is just a plain chunk of earth or the dried remains of coral skeletons. It can be bought off-the-shelf in most fish stores and is typically sold by the pound. On the other hand, live rock is a lightweight rock that comes loaded with bacteria, algae, and invertebrates on and within the various holes, crevices, and surfaces. It is sold by the pound as well, but is several times more expensive than dry rock. Because of its cost, many hobbyists choose to use live rock sparingly, reserving it for the most visible areas and using it to cover up the less desirable dry rock. However, any rock submerged in a saltwater aquarium will eventually become live rock once it’s colonized with bacteria, algae, and invertebrates, so you can achieve that classic reef look over time even if you start with just dry rock.

Mixing Saltwater
Mixing your own saltwater is an important step in setting up a saltwater aquarium. Ideally, it is best to mix your saltwater at least a day before using it to allow it to settle. However, if you are new to the hobby and do not have enough salt buckets, you can mix a bucket and fill up your tank.
When it comes to choosing the right salt mix brand, do not worry too much. You will find the one that works best for you as you get more experience in the hobby.
If you are new to mixing saltwater, the BRS saltwater mixing guide can provide a quick rundown of what is involved in the process. You need to stir the water until it clears, heat it, and let it settle overnight for best results.
One thing to keep in mind is that adding freshly mixed water directly to your saltwater aquarium setup can shock the living organisms on your live rock. If you are worried about losing your live rock, it is best to let the water rest and stabilize overnight. However, if you are confident in your setup, you can use your judgment.
Powerheads/waterflow
As mentioned earlier, insufficient water flow is one of the top five most common mistakes made by saltwater aquarium enthusiasts. It’s not just a matter of aesthetics or convenience, but rather a crucial aspect of ensuring the health and wellbeing of the living organisms in your tank.
Water flow is the life-blood of an aquarium, carrying essential nutrients, oxygen, and food to corals and other organisms that cannot move, and removing waste and carbon dioxide. Without proper flow, your reef will struggle to thrive and may even become overrun with harmful algae and other microorganisms.
Imagine a stagnant pond, filled with murky, scum-infested water. This is what can happen to your tank if you don’t have enough water flow. The stagnant areas become low-oxygen zones that promote the growth of problematic algae and other organisms that can cause big problems.
Fortunately, powerheads are a great and relatively inexpensive way to generate strong water flow in your tank. These small, submersible pumps can be strategically placed to direct water flow in specific areas of your tank, providing a more natural and dynamic environment for your organisms to thrive.
When selecting powerheads, be sure to consider the size and shape of your tank, as well as the specific needs of the organisms you’re keeping. Some corals and invertebrates prefer slower, gentler water flow, while others thrive in faster, more turbulent currents.
Overall, proper water flow is an essential element of a healthy saltwater aquarium, and powerheads can be a great way to achieve it. So don’t skimp on the powerheads, and take the time to research and choose the best options for your specific tank and inhabitants.
Heaters
While the heater may not be a necessary piece of equipment for your aquarium it can help maintain a constant temp in colder climates. I know it’s not the most visually appealing thing either. Most aquarium hobbyists prefer to have their heaters hidden from view. If you don’t have a sump, one of the best ways to hide your heater is to slide it down the back of the tank, behind some live rock. This will ensure that the heater is not visible and doesn’t detract from the beauty of your aquarium.
It’s important to make sure that there is enough open space around the heater to ensure proper water circulation. If the heater is placed in an area with poor water circulation, it may overheat and damage the surrounding equipment. It’s also important to keep an eye on the temperature of your aquarium, as a malfunctioning heater can cause your tank to overheat or underheat, which can be harmful to the living organisms in your aquarium.
In conclusion, while the heater may not be the most attractive piece of equipment in your saltwater aquarium, it is a necessary component for maintaining a healthy and stable environment for your aquatic pets in colder places where as a chiller may be needed in hotter places. In some cases it may warrant both due to low temps at night and high temps during the day. If you live in a relatively temperate area and your room the tank is in stays between 72-82 F, year round it will be easier to maintain your tank temp. You can also use a fan blowing at the top of your sump or tank, this will cause a higher evaporation rate but it will also help keep the temperature below life threatening conditions for your tank. If you have any more questions about this please give us a call and we would be happy to help apply this specific information to your specific situation.
Lighting
Adding the right lighting is a crucial step in setting up your saltwater aquarium. Lighting is not just for aesthetic purposes, but it plays a vital role in the health and growth of your coral and other inhabitants. With the advancements in technology, LED lights are the most popular option among saltwater aquarium hobbyists. They are relatively long-lasting, energy-efficient, and emit little heat, making them an excellent choice for both the health of your tank and your electricity bill.
When it comes to choosing the right LED lights for your saltwater aquarium, you may be overwhelmed with the different brands and models available. Should I spend $999.99 on a raidion or $60 on a cheap bar that says it does the same thing? Well that depends on what type of a system you are wanting to build. It’s important to read reviews and do your research to find the best fit for your tank and budget. Some discount brands offer reliable options that work just as well as the big-name brands, so it’s worth considering those as well. A caution though, if you don’t know are having trouble understanding Par/Pur/Kalvin or maybe even a histogram chart I would talk to your local trusted professionals that will help pick something that will work for you.
A few brands we know love and trust are radion, AI(aqua illumination), T5 (make sure its high output and coral rated bulbs), and kessil. Each has pros and cons and we have all of these types/brands running inside our store.
Once you’ve chosen your lights, it’s important to set them up properly. If your lights do not have built-in timers, it’s best to purchase one of the outlet timers online. You should aim to provide 8-10 hours of light each day. A lot of people are thinking 12 hours is okay but we have found the most success without pushing the corals that hard and long. We recommend avoiding lights with super strong white’s because you normally get crazy algaes and we have noticed a difference in coral growth with more blues than anything else.
It’s crucial to consider the intensity of the light and gradually increase it over time. Dimming the lights before adding your first corals and gradually increasing the intensity will help your corals adapt to their new environment and prevent them from getting stressed or dying. It’s essential to monitor the corals’ reactions and adjust the lighting accordingly to ensure their health and growth. If you have a non-adjustable light like a t5 set up, consider starting your lights for 4-5 hours a day and slowly go up 15 minutes every few weeks until your desired 8-10 hour timeframe. Ai lights and radions have an acclimation mode where you can allow the lights to slowly acclimate your tank to the lights over a period of time you choose, whether that’s 60 days or half a year. Remember that even though you may not have coral in your tank you have a culture of bacteria and algae that are there to help balance your tank. So don’t allow impatiens to take over and turn your lights up full blast because you can destabilize your ecosystem when it is most fragile and just growing and cause yourself the added headache of trying to fix it down the road.
Overall, installing your lights marks the completion of your saltwater aquarium set up! However, remember that maintaining the right lighting conditions is an ongoing process that requires regular checks and adjustments to ensure the health and growth of your aquarium inhabitants.
While the previous steps covered the essential equipment needed to set up a saltwater aquarium, there are additional pieces of equipment that can be useful in optimizing your aquarium’s environment. These can include a protein skimmer, which removes organic matter before it can break down into ammonia and nitrate, and a refugium, which is a separate compartment in the sump or a hang-on-back device that provides a place for beneficial macroalgae and microorganisms to grow, helping to remove excess nutrients from the water.
Wavemakers are also a popular addition to a saltwater aquarium, as they help create more natural water flow and prevent stagnant areas from forming, if you are doing a large tank as a custom build you can look into having a recirculatory system installed instead of wavemakers or powerheads. This will minimize cleaning and allow you to not have so many breakable pieces of equipment. Chillers can be useful for maintaining a stable temperature in the aquarium, especially in warmer climates or during the summer months. Dosing pumps can automate the addition of supplements, such as calcium or magnesium, to maintain proper water chemistry. UV sterilizers can help control harmful microorganisms, such as parasites and bacteria, in the water.
While these additional pieces of equipment are not strictly necessary, they can be beneficial in maintaining a healthy and thriving saltwater aquarium. It is important to research and understand the purpose and benefits of each piece of equipment before adding them to your aquarium setup. Also, be sure to follow proper safety guidelines when installing and operating any aquarium equipment. With all of your equipment set up and running, you can now sit back, relax, and enjoy the beauty and wonder of your very own saltwater aquarium.
Cycling your tank
To begin the cycling process, you can add a source of ammonia to the tank. This can be done using a pair of clownfish, just fish food, pure ammonia, or even raw shrimp. As the ammonia level rises, the beneficial bacteria will begin to grow and convert it to nitrite, which is also toxic to fish and invertebrates(if starting with clownfish not that it is not in high enough levels to harm or kill the fish unlike adding pure ammonia). Once nitrite levels start to rise, a second group of bacteria will develop and convert it to nitrate. Nitrate can be removed through regular water changes or by using specialized equipment such as a protein skimmer or a refugium. Then lastly a new strand of bacteria will push some nitrates into the next stage which is phosphates. Then you can perform a water change to remove.
The cycling process can take several weeks, and it’s important to monitor the levels of ammonia, nitrite, and nitrate during this time. When ammonia and nitrite remain 0 and nitrate and phosphates slowly climb you are ready for fish and some soft coral. A test kit can help you keep track of the levels and determine when the cycling process is complete. We do not recommend API although a lot of people get it because it’s cheap and they want a starter kit, we recommend Salifert test kits. These are more accurate and are still budget friendly. You can always have your local fish store run testing for you as well.
It’s important to note that during the cycling process, it’s not safe to add any corals or sensitive fish or inverts to the tank as high levels of ammonia and nitrite can harm or even kill them. Patience is key when it comes to setting up a saltwater aquarium, and taking the time to cycle the tank properly will pay off in the long run.
Quarantine Tank (QT)
Setting up a quarantine tank is relatively easy. You can use a simple tank with a heater and power filter, along with a sponge filter and PVC pipe for hiding places. The water should be similar to that of your main tank, and it’s a good idea to add a small piece of live rock or some sand to help establish the necessary bacteria. You should also keep a separate siphon and water-changing supplies for the quarantine tank to avoid cross-contamination.
When you purchase new fish or corals, keep them in the quarantine tank for a few weeks to observe them for any signs of disease or stress. This will also give them time to acclimate to your tank’s water parameters before introducing them to the main display. If you do notice any issues, you can treat the fish in the quarantine tank without risking the health of your entire aquarium set up. Remember copper treatments will kill inverts and coral! Make sure any treatments you do are right for the specific species you are working with. We also recommend getting into the habit of dipping your coral always! No matter if you think someone’s tank is clean or not.
While setting up a quarantine tank may seem like an extra step, it’s a small investment of time and money that can save you a lot of heartache in the long run. Imagine you have a large 300 gallon mixed reef tank. You have large beautiful tangs for 5-6 years and massive coral colonies. Lets say you buy a new piece of coral and it has a flatworm that eats your favorite type of coral(euphyllia, montimpora, acropora, zoanthids…) and you lose it all! Would you be sad? How about you add a firefish or new pair of clownfish to your tank that had ick or velvet and instead of them being in your small qt system they infect your entire 300 gallon system and you lose all your 5-6 year old fish and you now have to leave you tank fallow(without fish) for 3-6 months. That would be a sad day indeed. I have known reefers who have left the hobby over something similar.
Choosing Fish
When picking your first saltwater fish for your aquarium, it is important to consider a few factors. The fish should be hardy, meaning it can adapt well to the conditions in your home aquarium. This is especially important for beginners who are still learning how to maintain optimal water conditions. It is important to choose a peaceful fish that will not cause issues with other tankmates. This will help to maintain a harmonious environment in your aquarium. Have a stock list you plan on getting. Study out compatibility and be ready to tell yourself no on a few things. For larger tanks HAVE A TANG PLAN!!!!! I cannot say it enough! You need an order or else you will have problems 9 times out of 10.
Ideally, your first fish should also be aquacultured, meaning it was raised on a fish farm rather than caught in the ocean. Aquacultured fish are better for natural reefs and tend to adjust better to life in a home aquarium.
While the process of setting up a saltwater aquarium can seem overwhelming, it’s important to remember that it’s a rewarding and exciting hobby that can lead to a lifelong passion for marine life. Our team is available to help guide you through the process and answer any questions you may have. We’re always happy to provide additional information and support to help ensure the success of your new aquatic venture. Thanks for reading (skimming)! I hope this article helped you learn the basics of what you need to do and start studying the right material and get on track to become a successful reef keeper.